ATS integration (Recruiting)
The ATS integration sends Deeper Signals assessments to candidates from Workday and writes the results back. Complete Part 1 first; this part adds the Recruiting-specific configuration.
:::info Candidate personal data read by the ATS integration
Deeper Signals reads exactly four categories of data from a Workday candidate record: email address (required — it is how the candidate is invited and how their results are matched back), first name and last name (used to personalise the invitation; the integration functions without them), and the Workday identifiers used for correlation — Candidate_ID, candidate WID, Applicant_ID, the referenced job requisition ID/WID, and Worker_ID once a candidate is hired.
Not requested, not read, not stored: phone or mobile number, postal address, country, nationality, date of birth, gender, ethnicity, disability or veteran status, compensation data, résumé/CV content, application questionnaire responses, and social media identifiers. No field for any of these exists on the integration's candidate model. :::
2.1 Assessment Statuses
Run Maintain Assessment Statuses.
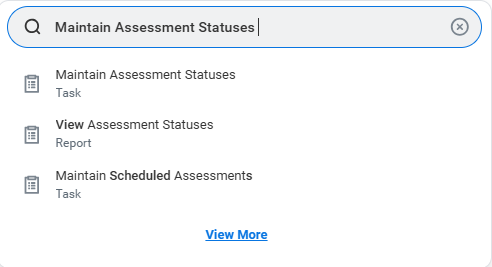
Search for Maintain Assessment Statuses.
Add the four statuses below. For each row, click the + icon, set the name, tick both Overall Status and Test Status, click OK, then on the saved row open Integration IDs → Edit Reference ID and set the Reference ID Value to the exact string in the table.
| Status Name | Reference ID Value | Overall Status | Test Status |
|---|---|---|---|
| DeeperSignals Invite Sent | Deepersignals_Invite_Sent | Yes | Yes |
| DeeperSignals Signed Up | Deepersignals_Signed_Up | Yes | Yes |
| DeeperSignals In Progress | Deepersignals_In_progress | Yes | Yes |
| DeeperSignals Completed | Deepersignals_Completed | Yes | Yes |
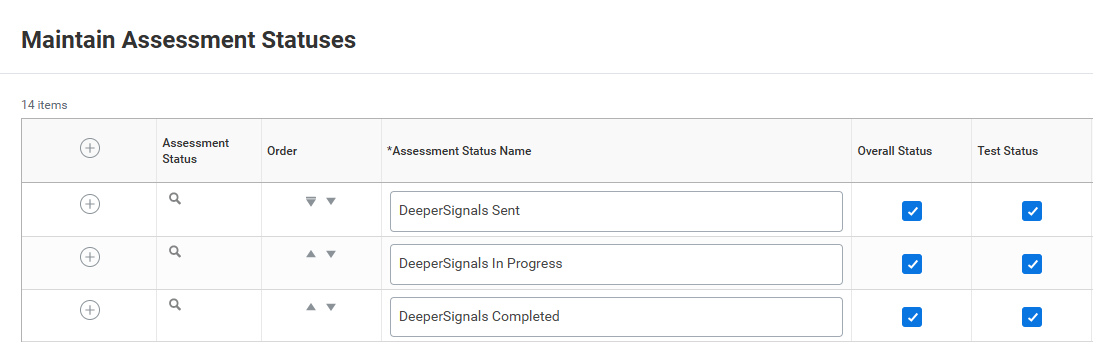
The four statuses created on the Maintain Assessment Statuses screen.
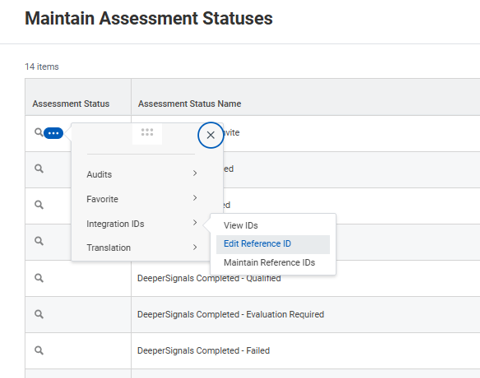
On the saved row, open Integration IDs → Edit Reference ID.
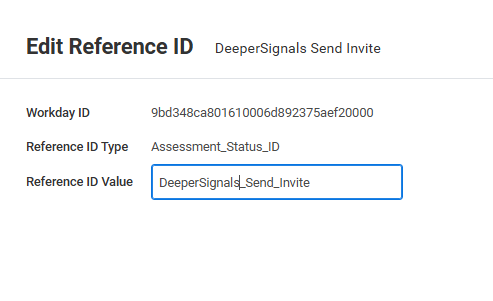
Set the Reference ID exactly to the value from the table.
:::warning Reference IDs must match exactly
The Reference IDs are matched character-for-character by Deeper Signals. Capitalisation matters: Deepersignals_ is correct (lower-case "s"); DeeperSignals_ is not. Use the values in the table verbatim.
:::
2.2 Recruiting Assessment Tests
Each Deeper Signals campaign that you want to surface in Workday needs its own row in Maintain Recruiting Assessment Tests. The Reference ID on the row is the link Workday uses to identify which Deeper Signals campaign the candidate should be routed into.
- Run Maintain Recruiting Assessment Tests.

- Click + to add a row. Give the test a meaningful name (e.g. "Deeper Signals Core Drivers").
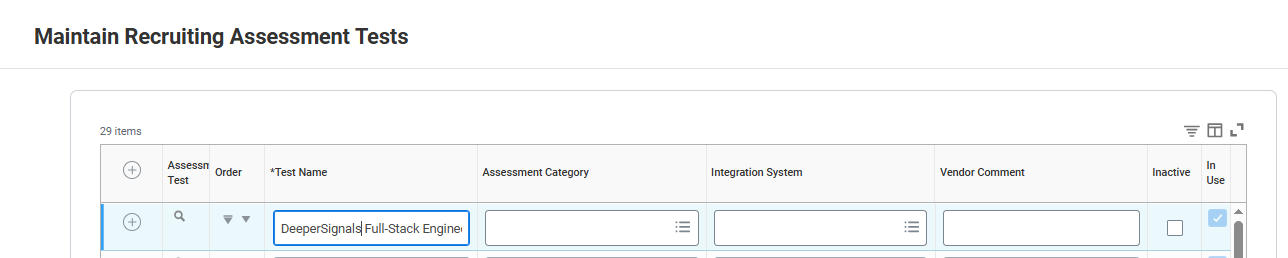
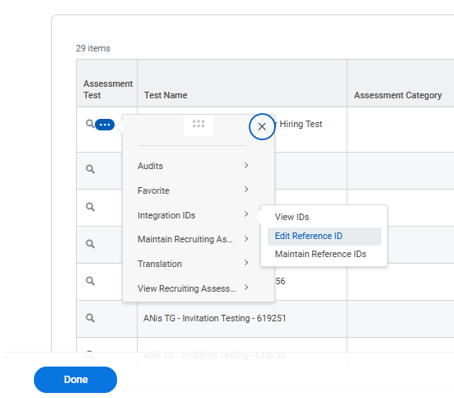
- Click OK to save. Then on the saved row open Integration IDs → Edit Reference ID.
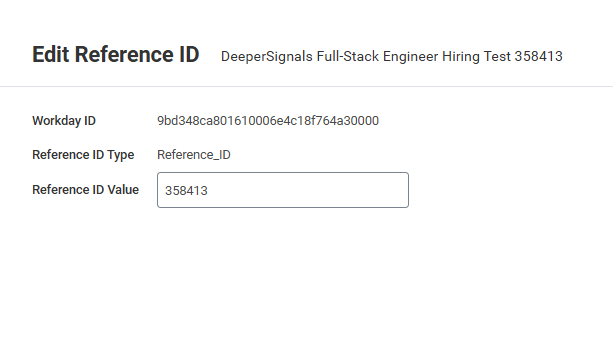
- Set the Reference ID Value to the Deeper Signals Campaign ID. To find it, sign in to the Deeper Signals admin app, open the campaign under Campaigns, click the kebab (⋮) menu next to Invite, and choose Copy Campaign ID.
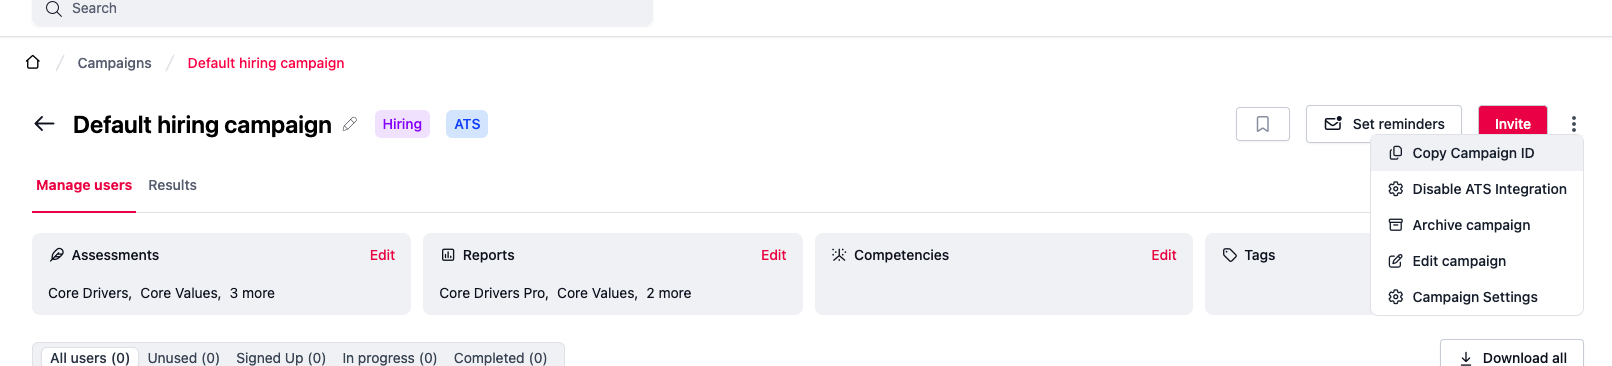
Deeper Signals admin: Campaigns → (campaign) → ⋮ → Copy Campaign ID.
Paste the value into the Workday Reference ID Value field (a numeric ID such as 1946) and click OK.
- Repeat for every campaign you want to surface in Workday.
:::info Workday cannot pull this list dynamically
Workday cannot ask Deeper Signals for the list of available campaigns. A separate Workday Assessment Test row must be configured manually for every campaign. Campaign IDs are unique per Deeper Signals account — copy each one from the campaign's kebab (⋮) menu in the Deeper Signals admin app. :::
2.3 Custom Object on Job Application
The ATS integration writes per-dimension scores (e.g. Driven, Curious, Resilient) into a custom object on the Job Application business object. Each completed assessment results in one row per dimension.
2.3.1 Create the custom object
Run Create Custom Object. Configure as follows:
| Field | Value |
|---|---|
| Workday Object | Job Application |
| Custom Object Name | Assessment Dimension Result |
| Allow Multiple Instances per Object? | Checked. |
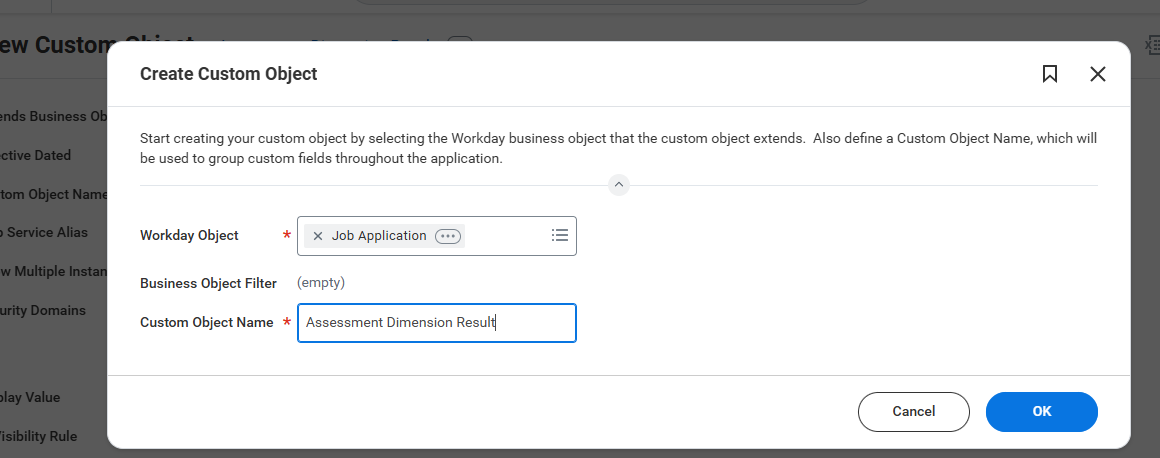
Create the custom object on the Job Application business object.
2.3.2 Add three fields
Add the three fields below. The Web Service Aliases must match exactly — these are the JSON keys Deeper Signals uses when writing the data.
| Field Label | Field Type | Web Service Alias | Notes |
|---|---|---|---|
| Dimension Name | Text | dimensionName | e.g. "Driven", "Curious" |
| Score | Integer | score | 0--100. On the field, set Display Option = Sort Descending. |
| Dimension Category | Text | dimensionCategory | Carries the name of the assessment the dimension belongs to — e.g. "Core Drivers". On the roll-up rows written once every assigned assessment is complete, the value is Competency. |

Dimension Name field (Text).
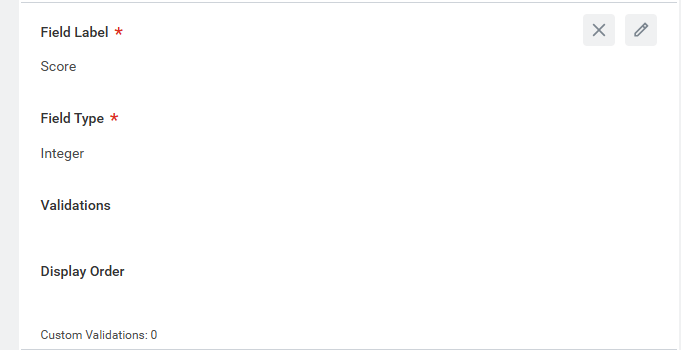
Score field (Integer).
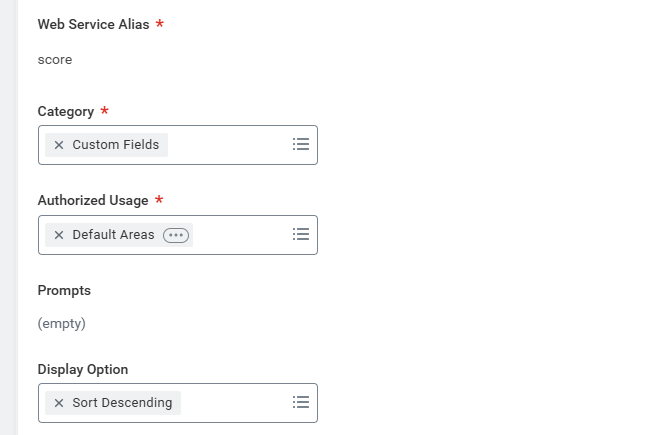
On the Score field, set Display Option to Sort Descending.
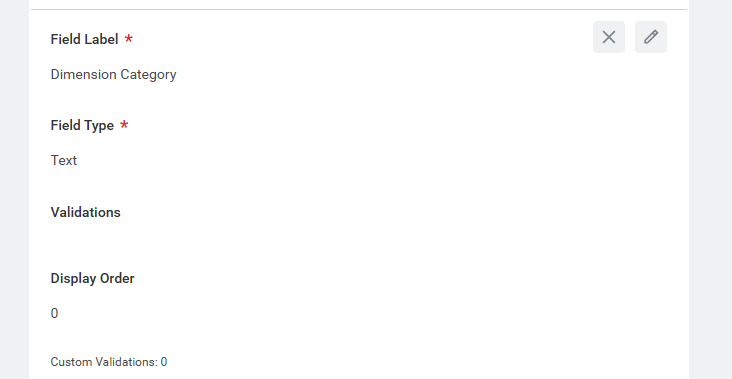
Dimension Category field (Text).
2.3.3 Set permissions and display value
Add the security domains below to the custom object so the integration can write rows and the right Workday users can read them. Then set the Display Value to Dimension Name.
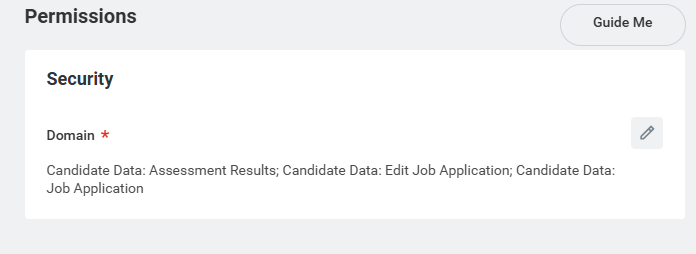
Permissions: Candidate Data: Assessment Results, Candidate Data: Edit Job Application, Candidate Data: Job Application.
2.3.4 Capture the Web Service Aliases
The integration uses three identifiers from the custom object:
- The Custom Object Web Service Alias — visible at the top of Edit Custom Fields. For consistency we recommend
candidateDeeperSignalAssessmentDimensionResult. - The three field aliases —
dimensionName,score,dimensionCategory.
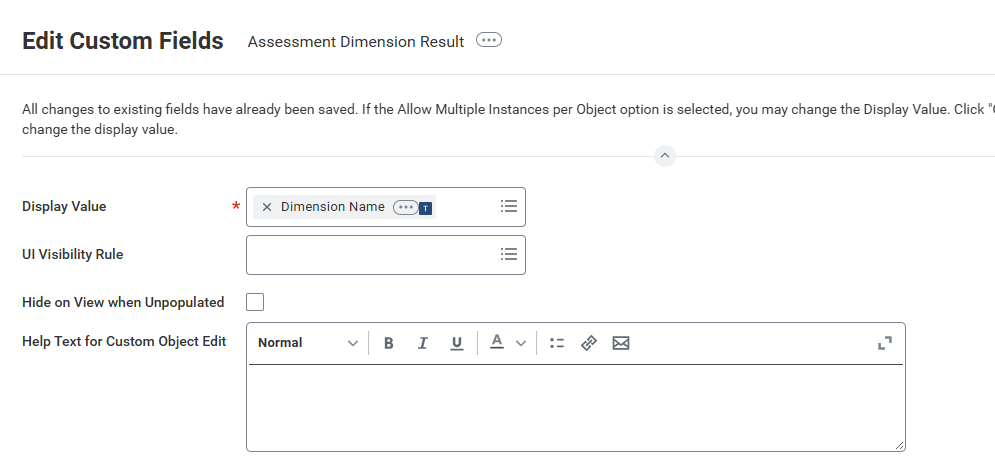
The custom object's Web Service Alias is shown at the top.
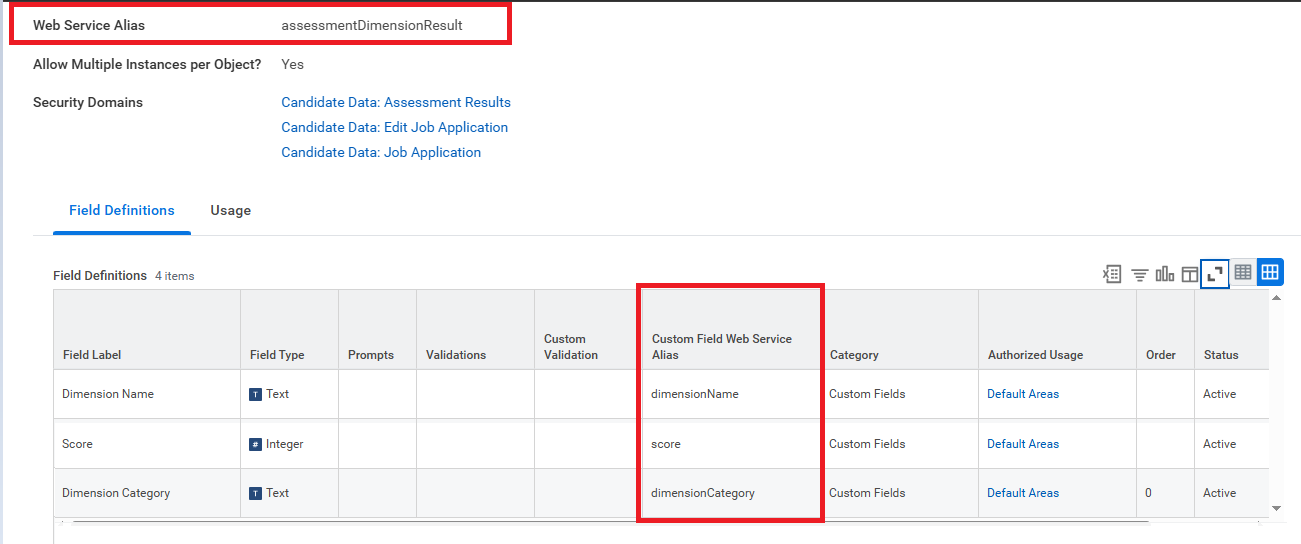
The three field aliases as they will appear to the integration.
Note these four identifiers (the custom object alias + the three field aliases) — you will enter them into the Deeper Signals admin UI in Part 5.3.4. They are also captured in the Part 4 checklist.
:::info Field names are flexible
The values candidateDeeperSignalAssessmentDimensionResult, dimensionName, score, and dimensionCategory are recommendations only. You can choose any Web Service Aliases that fit your tenant's naming conventions — the integration reads whichever aliases you enter on the Deeper Signals integration configuration page. The names suggested above are simply what we use in our reference setup so the field intent is unambiguous.
:::
2.4 What happens at runtime
Once the ATS configuration is complete, the day-to-day flow looks like this:
- A recruiter or hiring manager adds a candidate to a job requisition in Workday.
- They move the candidate to the assessment stage and click Assess, picking the Deeper Signals assessment test they want (the one whose Reference ID is the Deeper Signals campaign ID).
- Within roughly 10 minutes (configurable), Deeper Signals polls Workday's
Get_Assess_Candidatefor the new event, identifies the candidate viaGet_Candidates, and reads the job requisition title viaGet_Job_Requisitionsto name the campaign. It then emails the candidate the assessment. - HRIS deployments only: the recruiter and hiring manager are resolved to real people via the recruiter reference on the requisition and
Get_Organizations, and are set as campaign owner and access grantee. An ATS-only deployment skips this step —Get_Organizationsis never called and no worker data is read. - When the candidate completes the assessment, Deeper Signals immediately calls
Assess_Candidateto update the assessment status to DeeperSignals Completed, sets the score and a results URL, attaches the PDF report viaPut_Candidate_Attachment(Document CategoryOTHER_DOCUMENTS), and writes per-dimension scores into the Job Application custom object via REST. - If the candidate is later hired in Workday, Deeper Signals' hired-candidate poll detects the new
Worker_IDwithin 15 minutes and — if the HRIS integration is also enabled — writes the same assessment results to the worker record (see Part 3).
For a complete list of API calls, see Appendix A.